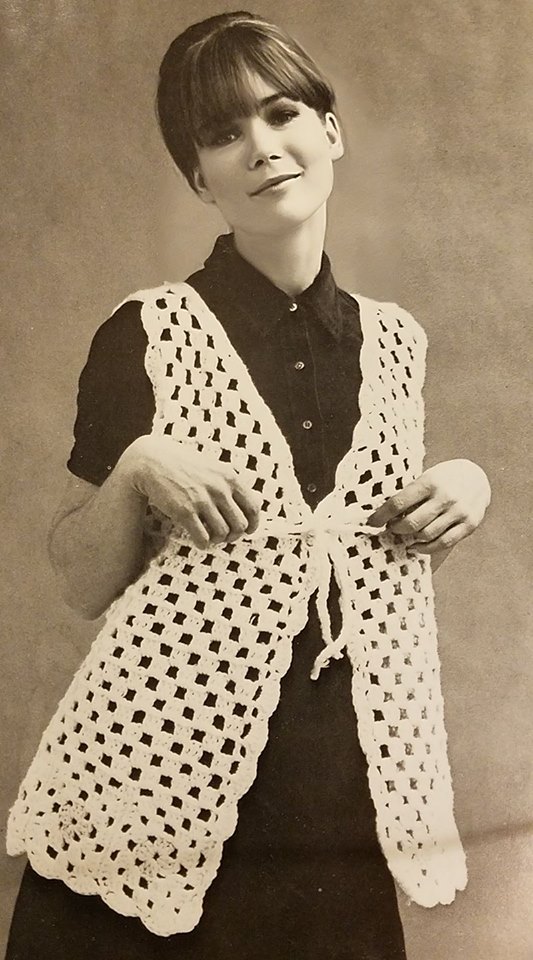
 Granny Crochet Vest Pattern
This vintage granny crochet vest pattern from the 70’s will make you yarn for the past.
I love going to the resale shops nearby to rummage through the craft sections and see what is new, what is old, and of course, when I find something old, naturally, I must buy! Which is where I found this fun pattern booklet
When I say old, I mean having something with history in your hands, where you can paint a mental picture of it’s past, the smell, the look, honestly, sometimes I feel like I belonged in a different place and time.
There is a complete calm when I walk into an antique store. I could spend hours in one, and here in Ludington, MI, we have our fair share of vintage. Just one more thing to love about this little town.
Now I realize this isn’t as vintage as many other things, but it still makes you envision another time, another way of life.
These older looks are coming back in fashion, and I must warn you all, for my own sanity, I plan on hanging around in vintage land for a bit. I’ve been struggling with my crojo lately and so rather than succumb, I am going to leap back, into another world and crochet my heart away!
The fun versatile Granny Crochet Vest pattern below comes from an old Woolworth pattern booklet published in 1970. Artist/Designer, unknown.
I really enjoyed making it myself and it works up so quickly.
A FULL VIDEO WALK THROUGH is available for this pattern in my YouTube channel. Another warning for you, my video editor that I’ve been using for years now crashed out on me, so I pretty much learned this new editor as I made the video walk through for this pattern, so bear with me, it’s a bit choppy in a couple of places, but nothing that should throw you off and I will soon perfect this video editor program… I promise! All in all, the video is pretty detailed so again there shouldn’t be any confusion there.
Any questions at all, feel free to contact me via the Contact link above or pm or tag me in the YarnWars group on Facebook.
Granny Crochet Vest Pattern
Materials Needed:
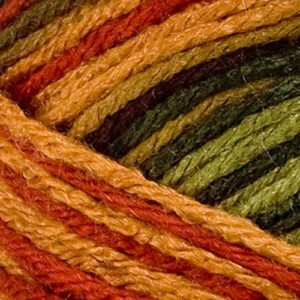 -Medium worsted weight yarn, I used ‘Caron Simply Soft’ for my granny squares together with ‘Red Heart With Love’ for one of my vests, ‘Bernat Pop’ for another.
Surfing around I ran into this cool variegated yarn (Red Heart With Love) which just screams 70’s to me! I’ll be searching for this one at my local stores =) LOVE LOVE LOVE these colors!
-K Hook
-Stitch Markers
-Scissors
-Blunt Needle
Stitches Used:
-Double Crochet (dc)
-Single Crochet (sc)
-Slip Stitch (sl)
-Granny Square Invisible Join Technique
Sizes Available:
-Small (32″ wide at bustline)
-Medium (36″ wide at bustline)
-Large (40″ wide at bustline)
Granny Square Pattern:
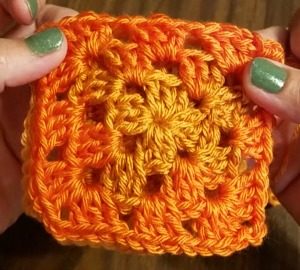
Round 1:
Chain 3, join with a slip stitch to form a ring, ch 3, 2 dc in ring, *ch 1, 3 dc in ring*, repeat from ** twice ending with ch 1, join with sl in 3rd of beginning chain. Slip st into next 2 st then into 1st ch 1 space to begin round 2.
Note: If you wish to change colors, you will want to join your next color into the corner space that begins next round.
Round 2:
Ch 3, 2 dc under ch 1 sp, ch 2, 3 dc under same ch 1 sp, ch 1, *3 dc, ch 2, 3 dc under next ch 1 space, ch 1*, repeat from ** twice more ending with slip st join to 3rd of beginning chain.
Round 3:
Ch 3, 2 dc under ch 2 space of corner, ch 2, 3 dc under same chain corner space. Ch 1, *3 dc into following ch 1 space, ch 1. *Working next corner space, 3 dc into chain 2 sp, ch 2, 3 dc into same ch 2 corner space. Ch 1, 3 dc into next ch 1 sp, ch 1*, repeat from ** twice more ending with sl stitch join into 3rd of beginning chain.
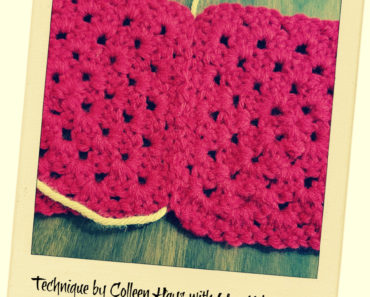
Note: Stitch each square side by side to form strip. Click on following link for the Ultimate Granny Square Invisible Join video tutorial. Make sure that all right sides are facing correctly in your strip.
-8 total square for size Small
-9 total square for size Medium
-10 total squares for size Large
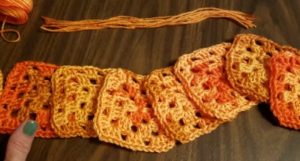
Body of Garment Pattern:
Row 1:
With the right side of the granny square strip facing you, join yarn to the ch 2 space of the top right side corner, ch 3, 1 dc under the same ch 2 space, ch 2 *3 dc under the ch 1 space, ch 2, 3 dc under the next ch 1 space, ch 2, 1 dc under ch 3 corner, 1 dc in the seam, 1 dc under ch 2 corner of the next square, ch 2*, repeat from ** across the strip ending with 3 dc under ch 1 space, ch 2, 3 dc under next ch 1 space, ch 2, 2 dc under ch 2 corner space
-24 ch 2 spaces for size Small
-27 ch 2 spaces for size Medium
-30 ch 2 spaces for size Large
Row 2:
Ch 3, turn, 3 dc under the ch 2 space, *ch 2, 3 dc under the next ch 2 space*, repeat from ** across row, ending ch 2, 1 dc in the top of the 3rd chain.
Row 3:
Ch 3, turn, 1 dc under ch 2 sp, *ch 2, 3 dc under next ch 2 sp*, repeat from ** across row, ending ch 2, 2 dc under turning chain.
REPEAT ROW 2 & 3 FOR PATTERN
Work even in pattern until piece measures 16″ OR DESIRED LENGTH to underarm, ending with PATTERN ROW 3
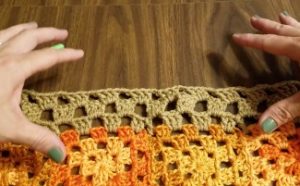
Arm Pattern:
Row 4:
Ch3, turn, 1 dc under ch 2 sp, * ch 2, 3 dc under next ch 2 sp*, repeat from ** (2 times for small) (3 times for medium) (4 times for large), ch 2, 2 dc under ch 2 sp.
Row 5:
Ch 3, turn, *3 dc under ch 2 sp, ch 2*, repeat from ** (2 times for small) (3 times for medium) (4 times for large), 2 dc under last ch 2 sp.
Row 6:
Ch 3, turn, 1 dc under ch 2 sp, *ch 2, 3 dc under next ch 2 sp* repeat from ** (1 times for small) (2 times for medium) (3 times for large), ch 2, 2 dc under the turning chain.

After Row 6, your arm should be at this point.
REPEAT THE DECREASE OF ROWS 5 & 6 (having one space less each row at front edge) (1 times for small) (2 times for medium) (3 times for large).
Row 7:
Ch 3, turn, 3 dc under ch 2 sp, ch 2, 3 dc under next ch 2 sp, ch 2, 1 dc under the turning chain.
Row 8:
Ch 3, turn, 1 dc under ch 2 sp, ch 2, 3 dc under ch 2 sp, ch 2, 2 dc under turning chain.
REPEAT ROWS 7 & 8 UNTIL ARMHOLE MEASURES (7″ for size small) (7.5″ for size medium) (8″ for large). Finish off.
Attach yarn to the TOP of the 3rd chain on the other side. Starting with ROW 4, WORK THE OTHER FRONT TO CORRESPOND.
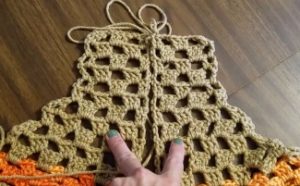
Back:
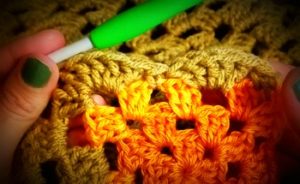
Leaving out (2) ch 2 spaces for each underarm and (3) groups of 3 dc (See image below), attach yarn to the next ch 2 space. Starting with PATTERN ROW 3, work even in pattern until the back measures the same as the front. Finish off.
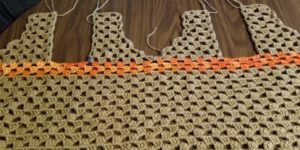
Finishing:
Sew shoulder seams. Work a border of 1 sc in space, *5 dc in the next space, 1 sc in the next space*, repeat from ** around the entire vest and the armholes, keeping the work flat as necessary. (See photo below)
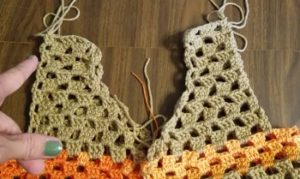
Rope Belt:
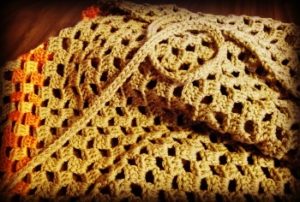
Using double strand of yarn, make a 24″ or longer chain as needed to tie at upper area of waist. (See photo below)
I made a chain as long as I needed it, measuring around chest area and working into 2nd ch from hook, slip stitched down entire row of chains. This gives it a bit more of an i-cord look.
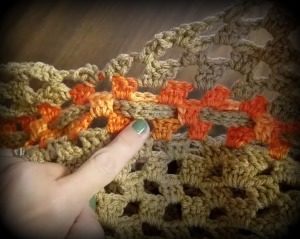
Weave belt through upper area of vest or at point that fits comfortably.
Block if necessary.
Again, if you are struggling with this pattern, there is a FULL VIDEO WALKTHROUGH available.
Would love for you to connect with us! We are all over on the Web! Join us:
Like our Facebook Page
in the Facebook Group
on Instagram
Thank you so much for joining me and taking the time to try something new with YarnWars!


How many skeins of yarn do I need for medium size?
So sorry for the late reply, hopefully it will help someone else, I believe I used 2 of the Red Heart with love yarn, there is 370 yards.
Someone in the comments of my video mentioned they used a total of 550 meters for a medium which sounds about right, just under 2 skeins.
saw your video on Granny square vest, how to make it a extra large?
Would be 11 starting granny squares. The written pattern shows the different sizes which only goes up to a large, however, you can see the increments for each different size, you would just add that difference for the extra large moving forward. =)
I watched the no show seam video h9wever you neglected to show how to tie of the end of the yarn you used to stitch together. On the granny best.
Hi Janet! There is a video 2 that shows how to tie the 4 corners together then bind off. It should show up after the video and there is a link in that video for the follow up as well.
HI Would it be possible to explain how I could enlarge this pattern to fit 2x?
Hi Barbara! I am so so sorry for this late reply. In the video I explain in the description the following: REPEAT THE DECREASE OF ROWS 5 & 6 (having one space less each row at front edge) (1 x for small) (2 x for medium) (3 x for large).
I hope this helps. Thanks so much! Have a great evening =)
Tnx. I’ll use the video. No problem.
I Love this jacket.
I hope you enjoy! Thanks for your comment Mae! ♥
Can I have this pattern in a diagram plz?
I’m sorry Mae, I am not familiar with diagrams so I don’t work them for my patterns. Something I would like to learn someday when I get some extra time. =( I only have the written verbal or the video patterns for these.