Tuscany Bag
 Full pattern design & technique created by Colleen Hays with YarnWars.com
Materials Needed:
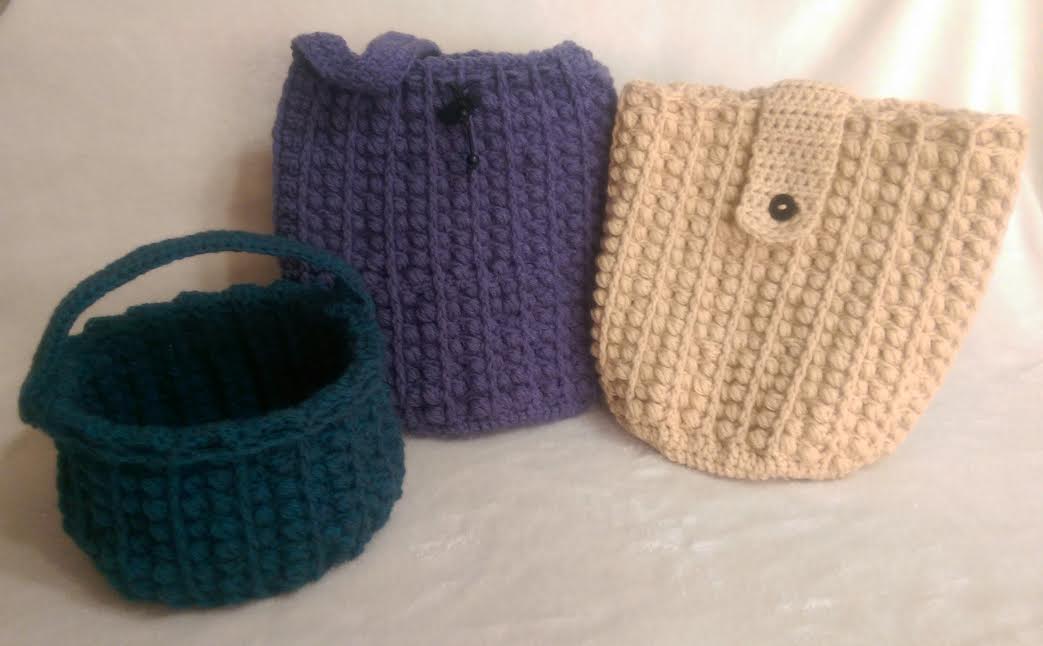
- Yarn– Bernat Super Value worsted Acrylic, I used just under a 426 yd skein, including handle for bag (Colors used in picture above – For the 2 bags I used Dark Heather & Steel Blue Heather, for the basket, I used Teal Heather.) You can use your choice of yarn, I would say Red Heart Super Saver would be very close to this
- J Hook – 6 mm (You can use an alternate hook, just remember that will determine sizing for your bag)
- Stitch Marker – (Only if you wish to use one, you really don’t need a stitch marker for this bag as the end of each row is quite visible.)
- Button or choice of closure for your bag
- Scissors
- Blunt needle
Stitch Techniques Used: (All video links will open in new window so you won’t lose your place in pattern.)
Magic Circle – (Video)
Cluster – Yarn over hook, insert hook into stitch, draw 1 strand through, with 3 loops on your hook, yarn over again, insert hook back into same stitch, pull through another strand, with 5 loops on your hook now, yarn over once more, insert hook into same stitch, pull through one last strand. You will now have 7 loops on your hook. Yarn over, pull through 6 loops, yarn over, pull through last 2 loops on hook. (Video)
Fpdc – (Front Post Double Crochet) Working into the dc from previous row, yo and insert hook from the front to the back and around the dc, yo, complete by working a regular dc. (See image below) (Video)

Bpdc – (Back Post Double Crochet) Working into the dc from previous row, yo and insert hook from the front to the back and around the dc, yo, complete by working a regular dc. Worked the same as above stitch (fpdc) only on back side of project- (See image below) (Video)

There is a FULL Video tutorial for this Tuscany Bag crochet pattern. Separate areas of pattern may also be highlighted throughout the written pattern to help with certain sections of the pattern. Those links will take you to the specific section of the video that goes over that particular area stated.
If you prefer to download & print the pdf for this pattern, it can be found on our Group page in the Files tab below the timeline photo. All of our pdf downloads are housed on our group page for resource purposes, to keep the site from data usage issues. Otherwise, continue on =)
The following area is highlighted only to separate and show the Grapevine Technique from the rest of the pattern.
Grapevine Stitch – The grapevine as I call it is more of a technique than it is a stitch really; it is a series of combined stitches to create the look of a vineyard!

It can be worked into any pattern that is worked in either the round or straight across, (of course it looks much better, done over at least 18 stitches). The look is complete in as few as 6 rows Before beginning this technique, you will need for your very 1st row previous to the grapevine to be either a row of dc’s or a row of alternating sc & dc as seen in this pattern.
Here is a sample of the grapevine technique/stitch. You will see that you can make this look into any size, through any number of stitches, in multiples of 9.
The following example swatch will be worked over 18 stitches:

Start by chaining 21. Dc into 3rd ch from hook to end. Turn.
- Ch 3, skip 1st 2 stitches, cluster in nxt, *ch1, skip nxt st, cluster in nxt* repeat **, after creating 8th cluster, ch 1, skip nxt 2 st & dc into last st. turn
- Ch2, turn, fpdc into 2nd dc from prev row just before your 1st cluster, sc in top of 1st cluster, bpdc into nxt dc from row before cluster, sc in top of nxt cluster, *fpdc into nxt dc, sc in top of next cluster, bpdc into nxt dc, sc in top of nxt cluster* repeat ** after sc in last cluster, dc into last dc. Turn
- Ch 2, skip 1st st, cluster in nxt, *ch1, sk nxt st, cluster in nxt, ch1* repeat **, after 8th cluster, ch 1, skip nxt st, & dc into last st. turn
- Ch 2, fpdc around 1st fpdc fr row 3, sc on top of 1st cluster, *bpdc around nxt bpdc, sc on top of cluster, fpdc around nxt fpdc, sc on cluster*, rep**
– Repeat rows 4 & 5 until you’ve reached the desired length for your project.
You will find that by working the above technique, you will add an extra plushy thickness to your project!
Sim looking for your hat patterns, the one that has the front post around the dc
Oh I’m not sure Cathrin! I’m so sorry… I believe I have several patterns that include front post… can you give me a little more detail on what you were looking to make?
I’m sorry Cathrin… I missed the “hat” in that comment… lol… could it be the Stormy Waters pattern? http://www.yarnwars.com/stormy-waters-hat-pattern/
Looks very good for a bag that is solid and unlike many more fragile patterns that would only take light use. Please tell me what the sizes are for this bag as there was no basic finished sizes or stitch gauges to show what can be expected.
Hi Jean! Yes, the Tuscany bag is quite solid with a very nice texture… The size on both the cream and blue bags I mention in the pattern is 10″ tall. I want to say they were approximately 8″ wide.